
Cloud storage stands for virtualised pool of network storage most commonly hosted by third parties. Cloud storage is a network-based service which physically do not exist but remains somewhere in the cloud. To be more clear, cloud storage means sharing data over network, rather than having local servers or personal device.
Cloud storage is all around us in our smart phones, on desktops and servers etc. TheDropbox application which is now available on smart phone is nothing but cloud storage application. Google Drive is another cloud storage application which lets you store and access your stored data from anywhere and anytime.
This article aims at – Building your personal cloud storage using ownCloud application. But what is the need of building personal cloud when there are third party hosting. Well all the third party hosting limits you to work with the given configuration and storage limit. With the ever expanding list of photos, videos, mp3′s of storage is not sufficient, moreover cloud storage is a relatively new concept and there are not many third party cloud storage host and the available one is too much costly.
What is ownCloud
ownCloud is a free, open-source and powerful web application for data synchronization, file sharing, and remote storage of files. ownCloud is written in PHP/JavaScript languages. It is designed to work with several database management systems, including MySQL, MariaDB,SQLite, Oracle Database, and PostgreSQL. Moreover owncloud can be deployed on all known platforms viz., Linux, Macintosh, Windows and Android. In short it’s a robust, platform Independent, flexible in terms of configuration and usability, easy-to-use open source Application.
Features of owncloud
- Store files, folders, contacts, photo galleries, calendar, etc on the server of your choice, Later you can access it from mobile, desktop, or web browser.
- In the world of gadgets, a normal person have tablet, smart phone, laptop, etc. Own cloud lets you sync all your files, contacts, photo, calendar, etc synced among the devices.
- In the era of sharing aka Facebook, Twitter, Google+, etc, owncloud lets you share your data with others and share them publicly or privately as per your needs.
- Easy user interface lets you manage, upload, create user, etc in a very easy fashion.
- A special feature is that, even user can undelete the accidentally deleted data from Trash, is not it easy to handle and maintain.
- The search feature in owncloud is very responsive which is done in background and lets user search by name as well as file type.
- Contacts are organised in categories/group hence easy to access contacts on the basis of friends, co-worker, Family, etc.
- You can now access external storage be it Dropbox, FTP or anything else by mounting.
- Easy to migrate to/from other owncloud server.
Step 1: Install ownCloud Storage in Linux
In order to setup your own personal cloud storage (ownCloud), you must have LAMP (Linux,Apache, MySQL, PHP) stack installed. Other than LAMP stack you might need Perl andPython based upon your use.
On Debian/Ubuntu/Linux Mint
# apt-get install apache2 apache2-doc apache2-utils mysql-server mysql-client php5 php5-mysql
On RedHat/CentOS/Fedora
# yum install httpd mysql-server mysql-client php php-mysql
Step 2: Create Cloud Database
Once you setup LAMP stack on your personal box, just login to your database (MySQL, here).
# mysql -u root -p
Enter mysql root password. Now we will be creating a database (say cloud).
mysql> create database cloud ;
Query OK, 1 row affected (0.00 sec)
It is not a good idea to access your database from root, hence grant all the permission to a normal user (say tecmint).
mysql> grant all on cloud.* to tecmint@localhost identified by 'my_password';
Query OK, 0 rows affected (0.00 sec)
Step 3: Download and Install ownCloud Application
Now its time to Download latest ownCloud (i.e version 5.0.12) application using below link.
Alternatively, you may use wget command to download the source tar-ball package.
# wget http://download.owncloud.org/community/owncloud-5.0.12.tar.bz2
You may alternatively install from source package using APT or YUM. The installation instruction can be found at:
However we choose the TAR package which is universally accepted and works on most of the known system.
After Downloading the owncloud package, move it to your Apache working directory, which is/var/www (for Debian) and /var/www/html (for RedHat).
# cp owncloud-5.0.12.tar.bz2 /var/www/  [For Debian based Systems]
# cp owncloud-5.0.12.tar.bz2 /var/www/html/ [For RedHat based Systems]
Next, extract the package using tar command as shown below.
# tar -jxvf owncloud-5.0.12.tar.bz2
Since the TAR Archive is extracted you may remove the Archive.
# rm -rf owncloud-5.0.12.tar.bz2
We might need to change the file permission of owncloud, in our Apache working directory.
# chmod -R 777 owncloud/
Note: Remember we are giving read, write and execute permission to all, which is although risky but this time needed since several configuration file would be written automatically. We later need to change permission to 755, once the setup is finished.
Step 4: Configuring Apache for ownCloud
For security purpose ownCloud uses Apache‘s .htaccess files, in order to use them. We need to enable two Apache modules mod_rewrite and mod_headers for ownCloud to function properly. Type the following command to enable these modules under Debianbased systems only, for RedHat systems they are enabled by default.
# a2enmod rewrite
# a2enmod headers
Additionally, we need to enable mod_rewrite rules to work properly under Apache‘s main configuration file. Open the Apache global configuation file.
# nano /etc/apache2/sites-available/default [For Debian based Systems]
# vi /etc/httpd/conf/httpd.conf   [For RedHat based Systems]
There, find “AllowOverride None” and change this to “AllowOverride All” as shown.
AllowOverride None
Change this to:
AllowOverride All
Now we need to restart Apache to reload new changes.
# service apache2 restart   [For Debian based Systems]
# service httpd restart    [For RedHat based Systems]
Step 5: Access ownCloud Application
Now you can acess your very personal cloud storage at:
http://localhost/owncloud
OR

http://your-ip-address/owncloud
We need to enter username, password and mysql database username, password anddatabase name, (Here the one we created above- cloud).
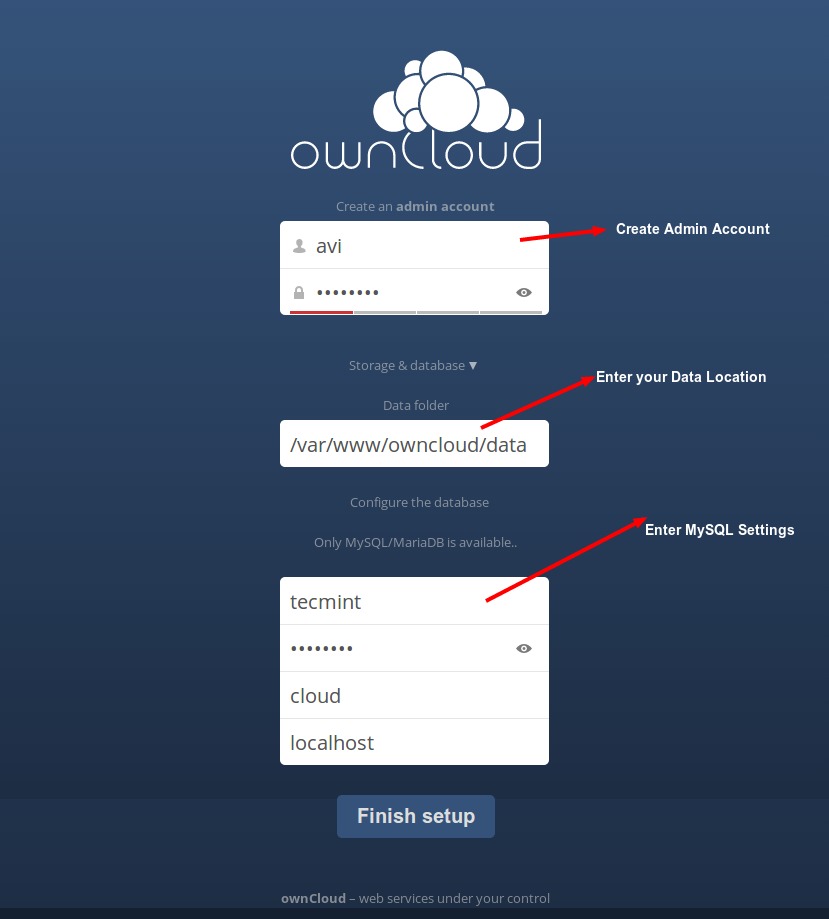
Once all the correct values are entered, click Finish and your private cloud storage is ready, you may have a test drive. Login to owncloud
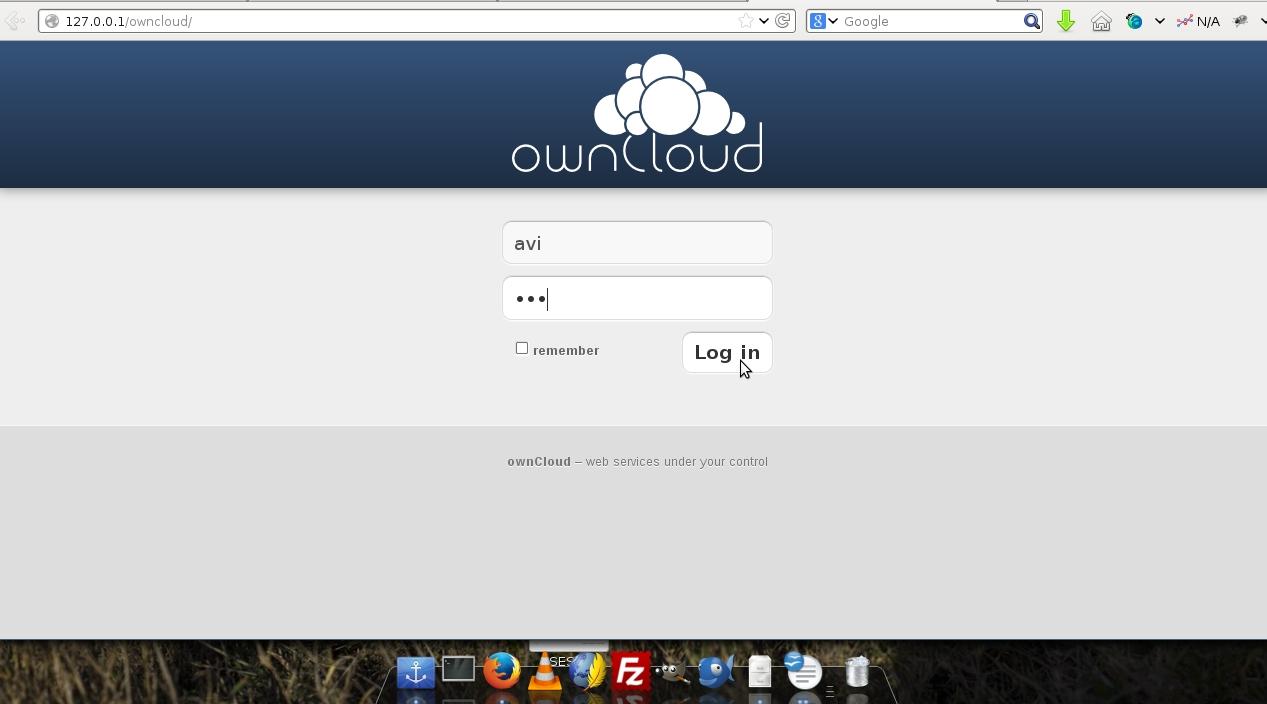
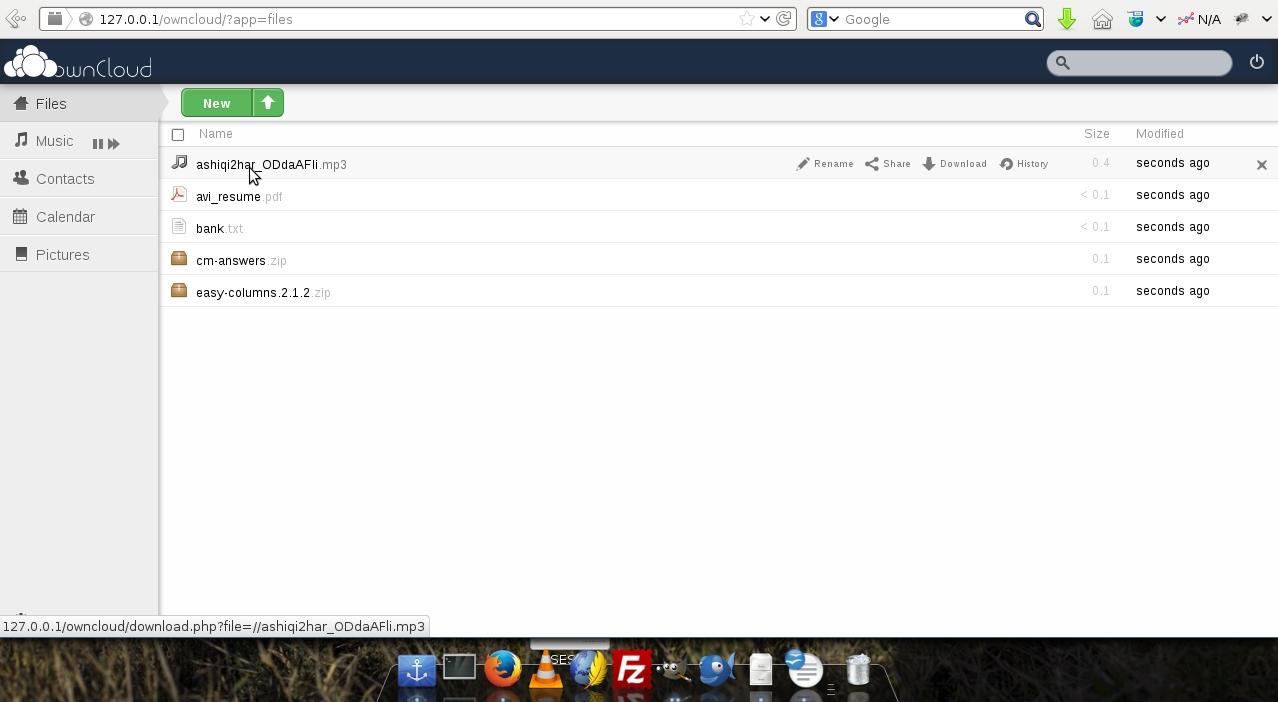
After successful login, you are greeted with the working interface:
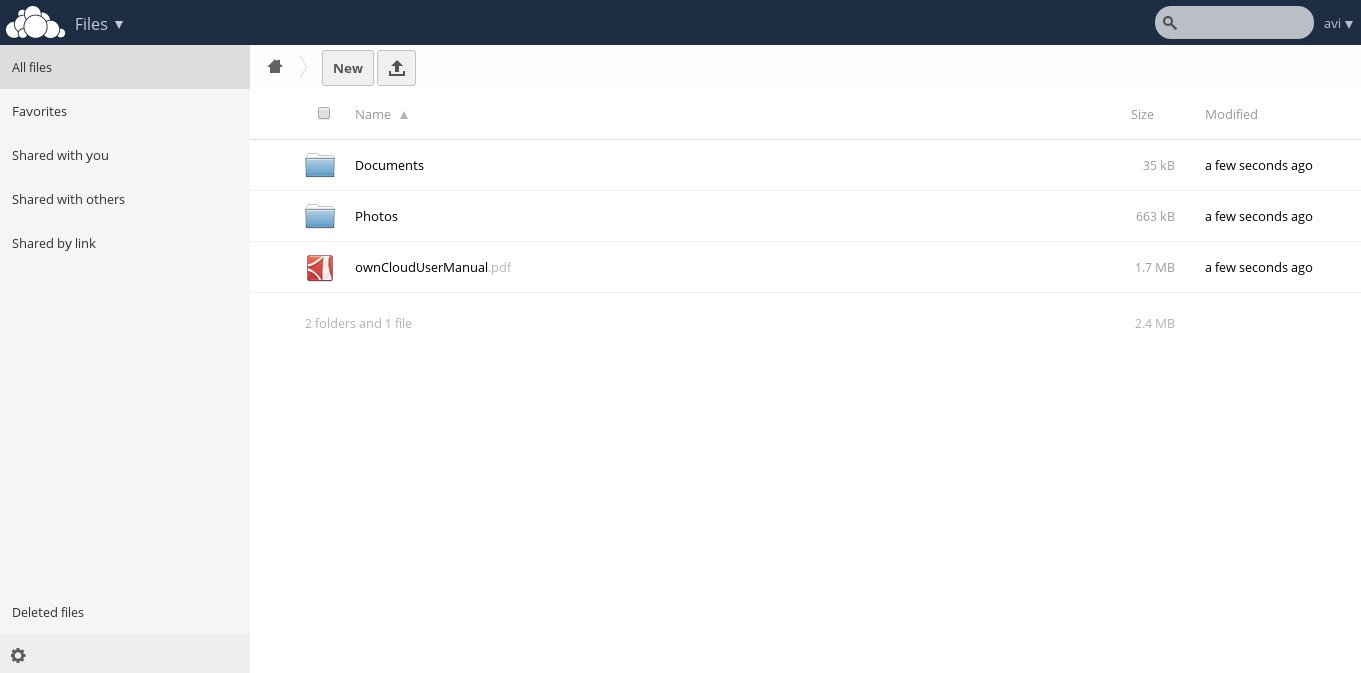
Upload a picture file.
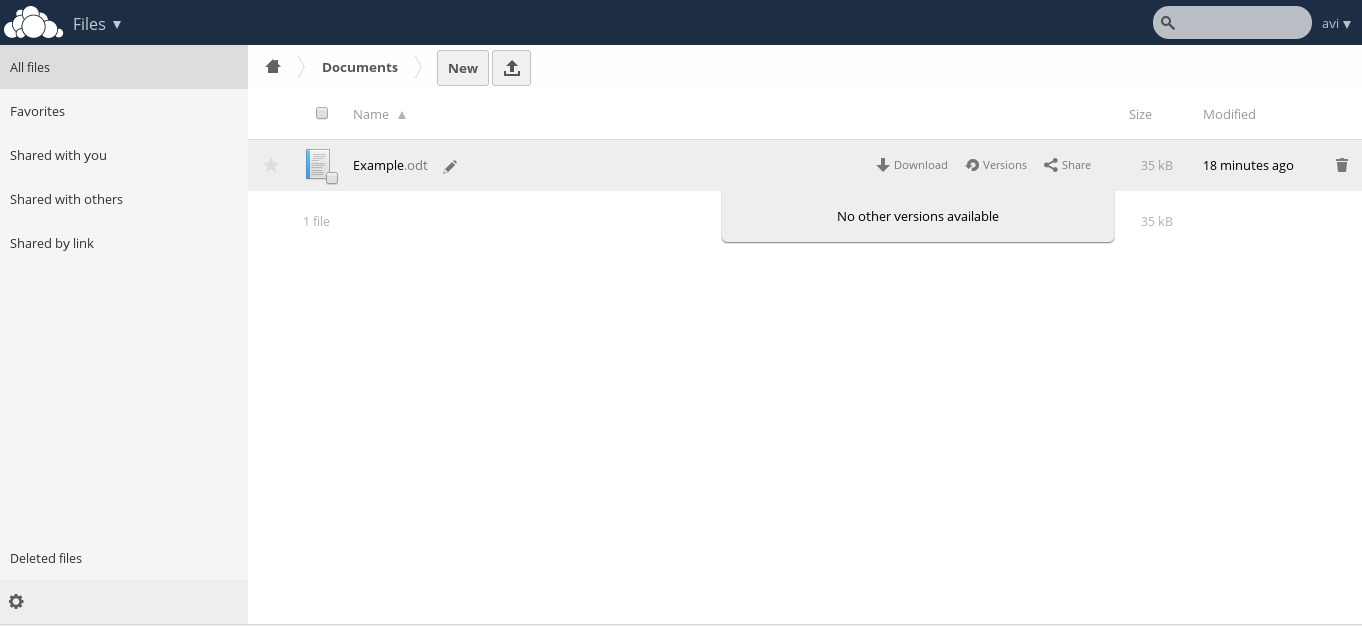
Upload videos, pictures, PDF, etc similarly
The uploaded video/mp3 file can be played from the interface itself by double clicking (check top of left most column playing mp3)
Note: You can add users or imports user account, change password, assign user role and allocate space by clicking the Gear icon on left bottom of the page.
You may now add folder, sync media files be it pictures, images and videos from the mobile application. Owncloud lets you add new user, and sync calendar, contacts, Media files, etc.
It also has a built in MP3 Player, PDF Viewer, Document Viewer, and a lot many which is worth a try and explore. So what are you waiting for? Become a proud owner of private cloud storage, give it a try!
Reference Links
That’s all for now. Don’t forget to provide us with your valuable feedback in comments. I’ll soon be here with another interesting article, you people will love to read. Till then Stay tuned, connected to tecmint and healthy. Like and share us, help us get spread.
The Dropbox application which is now available on smart phone is nothing
Dimensions were sufficient for me, plus the convenient parking is a nice bonus when you need to quickly stop by, pull something out of storage, and jet off.
ReplyDeleteSelf storage in Strathpine
mmmm, what's that mean? I don't get it -_-
DeleteThis post is so useful and valuable to increase our knowledge. I am happy that you have shared great info with us. Grateful to you for sharing an article like this. Storage Services
ReplyDeleteHey There. I found your blog using msn. This is a very well written article. I’ll be sure to bookmark it and come back to read more of your useful info. Thanks for the post. I’ll definitely return. DOWNLOAD PRIVATE INSTAGRAM VIDEOS
ReplyDeleteWorker Environment: In conventional hosting your site is situated on a solitary worker. Envision if something happens to that worker, every one of your information is lost, in short order. Be that as it may, on account of cloud hosting you are furnished with a repetitive worker climate. A reinforcement will be saved if there should arise an occurrence of a crisis. https://onohosting.com/
ReplyDelete